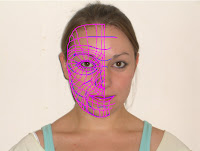
This week the project can be broken down into two parts; the first is the creation of a 3D face prototype and the second is taking the next steps for the YMCA assignment. Having pitched the original YMCA idea to the course leader and received positive feedback and constructive criticisms the intention is to draw full scale front, back and side views of each young male characters. The aim for doing this is so there are defined shapes and sizes to work with; a two dimensional template for the three dimensional characters. We also decided to play with textures that could be worked with in Studios Max; whether to use block colours or create such materials as denim, cotton and leather. These options will be decided later in the final stages of the project as the actual build is more important to focus on at this stage. The meeting with Craig Gough is yet to be arranged but the possibilities are for week five or six.
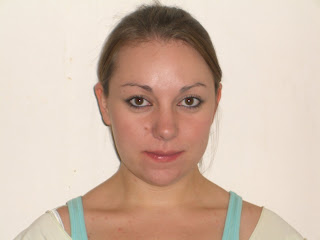
The second part of the project for this week is the creation of a prototype face. The preparation of which requires a front and side view photographed self portrait.
The second part of the project for this week is the creation of a prototype face. The preparation of which requires a front and side view photographed self portrait.
Once taken these photos had to be loaded into Adobe Photoshop and then the face must be adjusted so the features are both the same size and level between the two different views. In order to create a three dimensional face in 3D Studios Max preparation can be done to simplify the process in Photoshop. The basic idea here is to draw in the structure lines of the face, tracing the shapes and contours around the eyes, mouth, cheekbones and chin providing to scale guidelines to trace in 3DS Max. To do so, an online tutorial found at
provided step by step instructions directing where the lines need to be drawn and how to achieve the best results. Once the feature lines have been drawn on a separate layer to the photograph of the front view using a blue paintbrush a new layer must be created. Then the next step is to trace the blue feature lines and extend them to outline each shape of the face and draw in quad lines which will be used to construct the model of the face when transferred into the 3D package.

The tutorial took a matter of hours to complete to be at a standard that was high enough for this level of work. The image was imported into 3D Studios Max and this was where some teething problems were encountered. The resolution of the lines drawn in Photoshop that shown in 3Ds Max are not of a high quality and therefore the quad lines are not visible enough to be traced as intended.


